Managing Exports
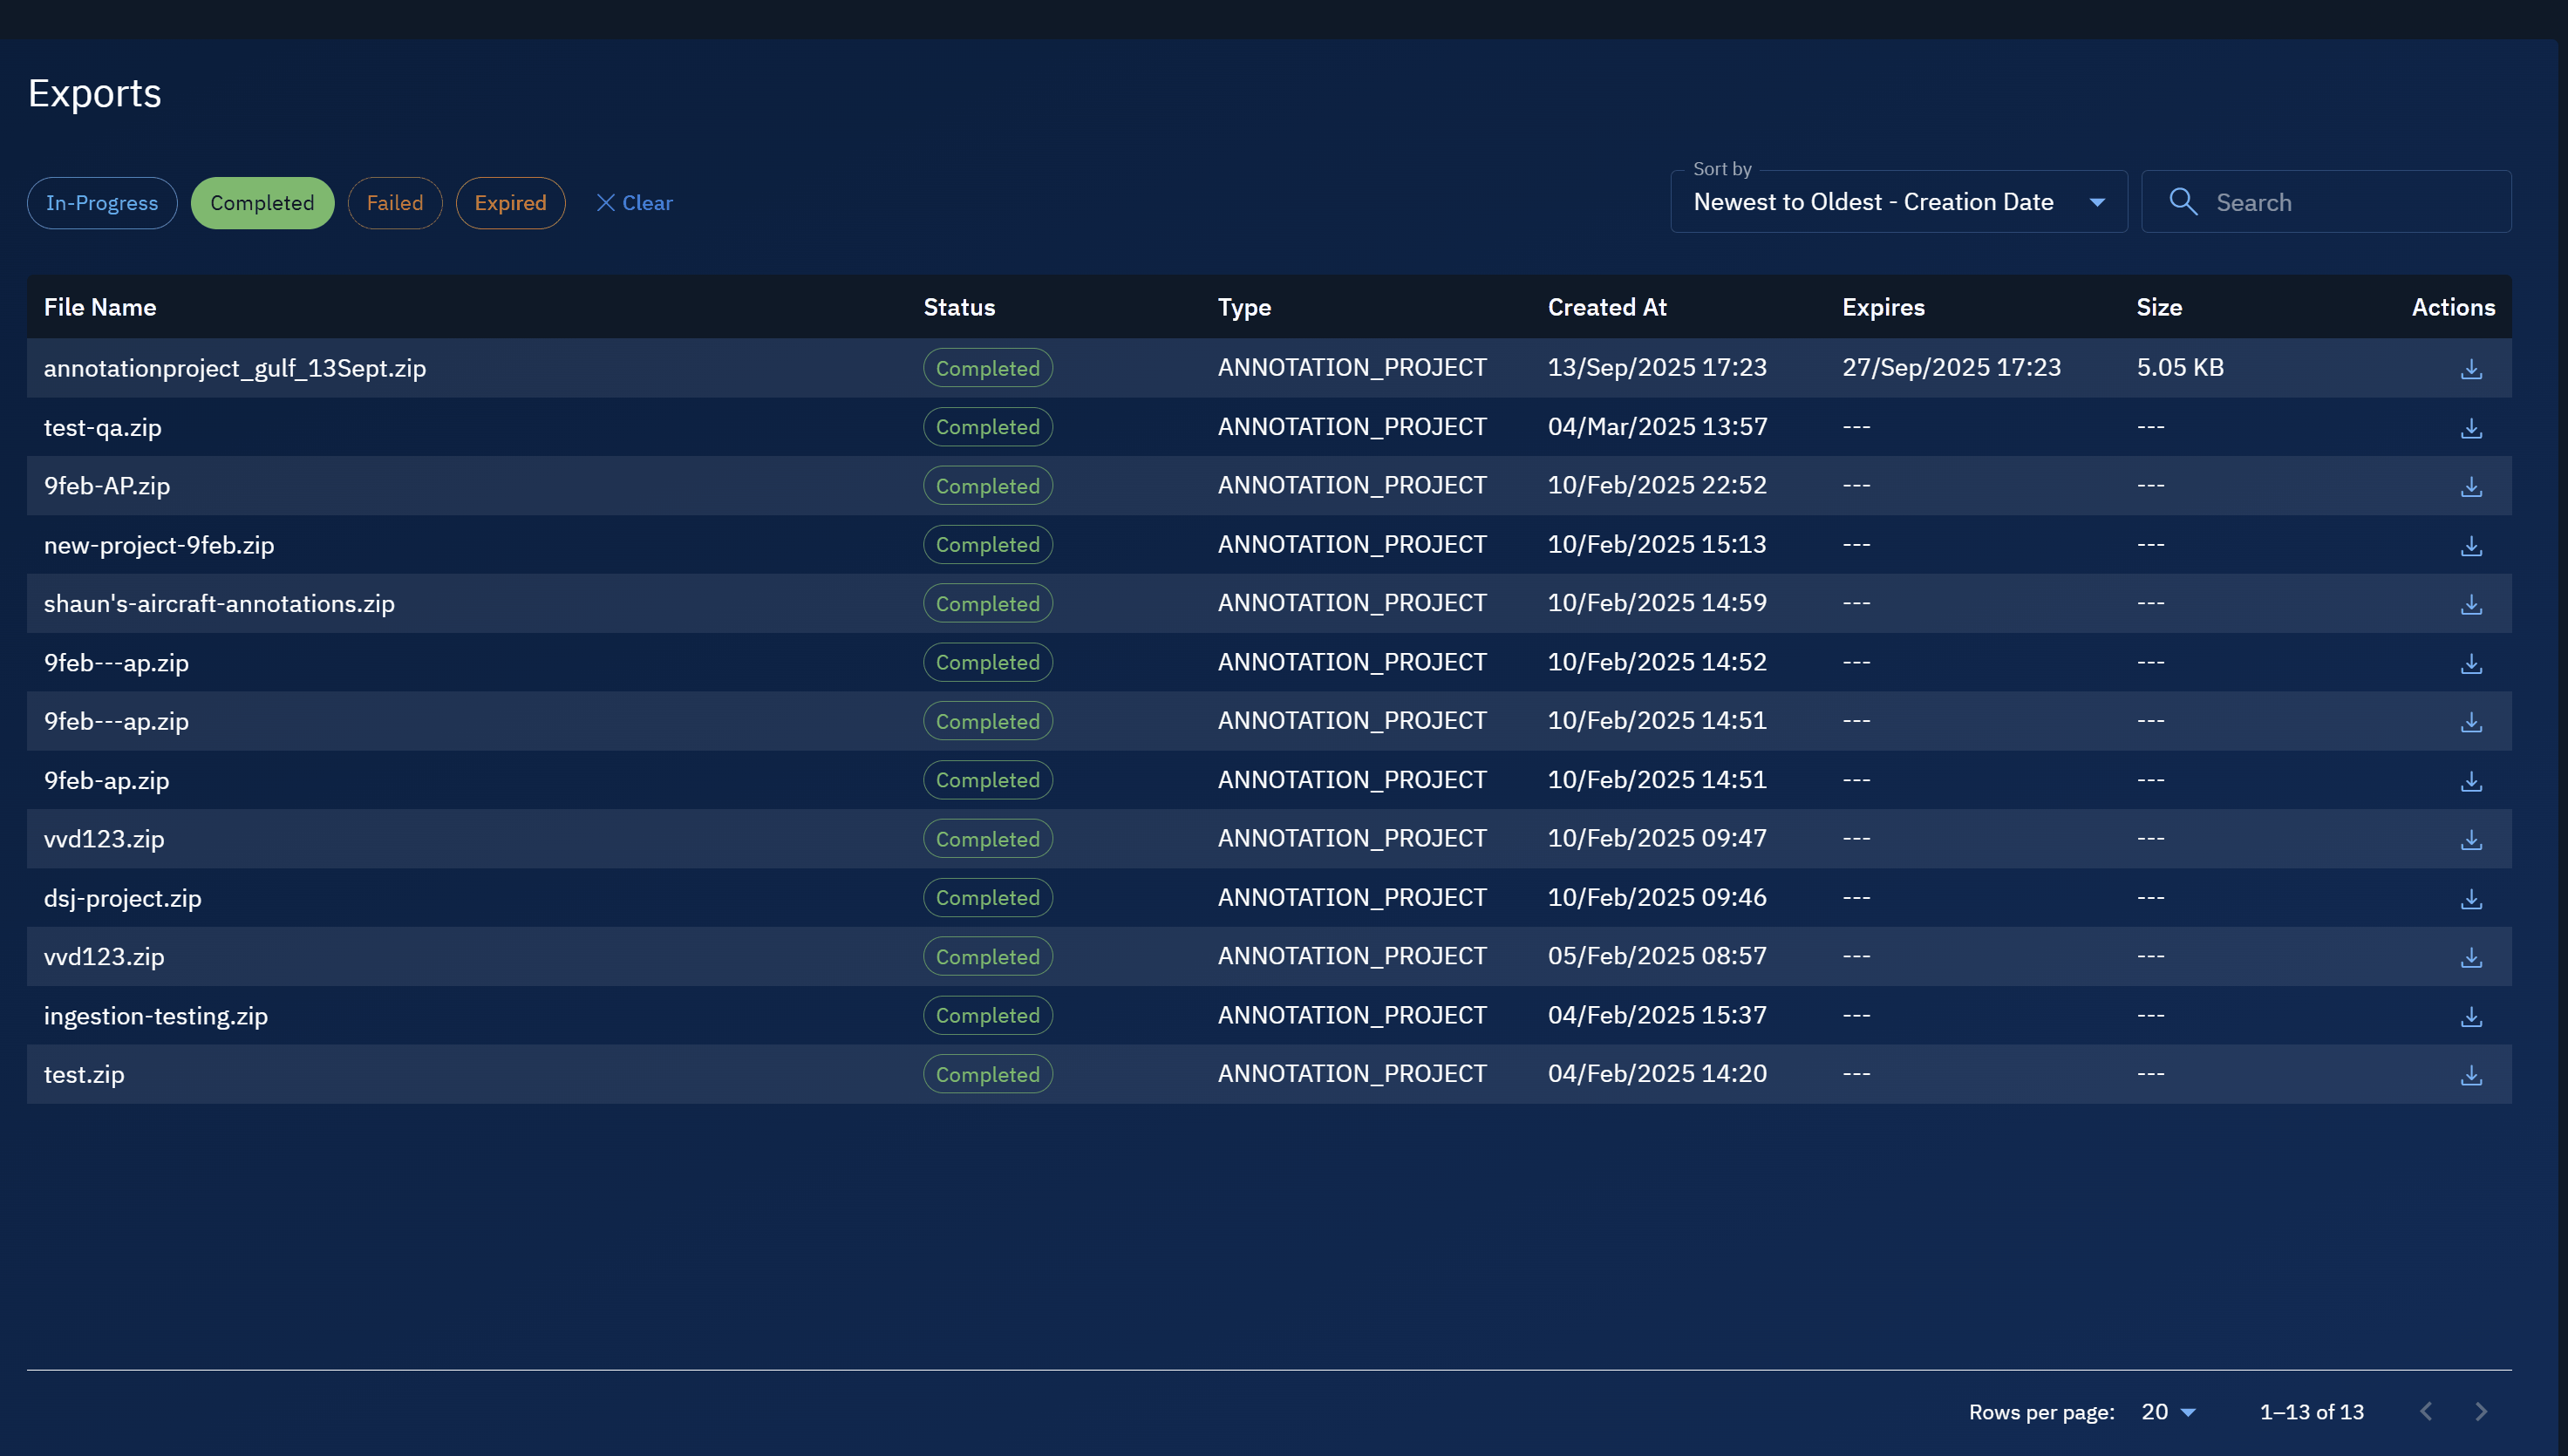
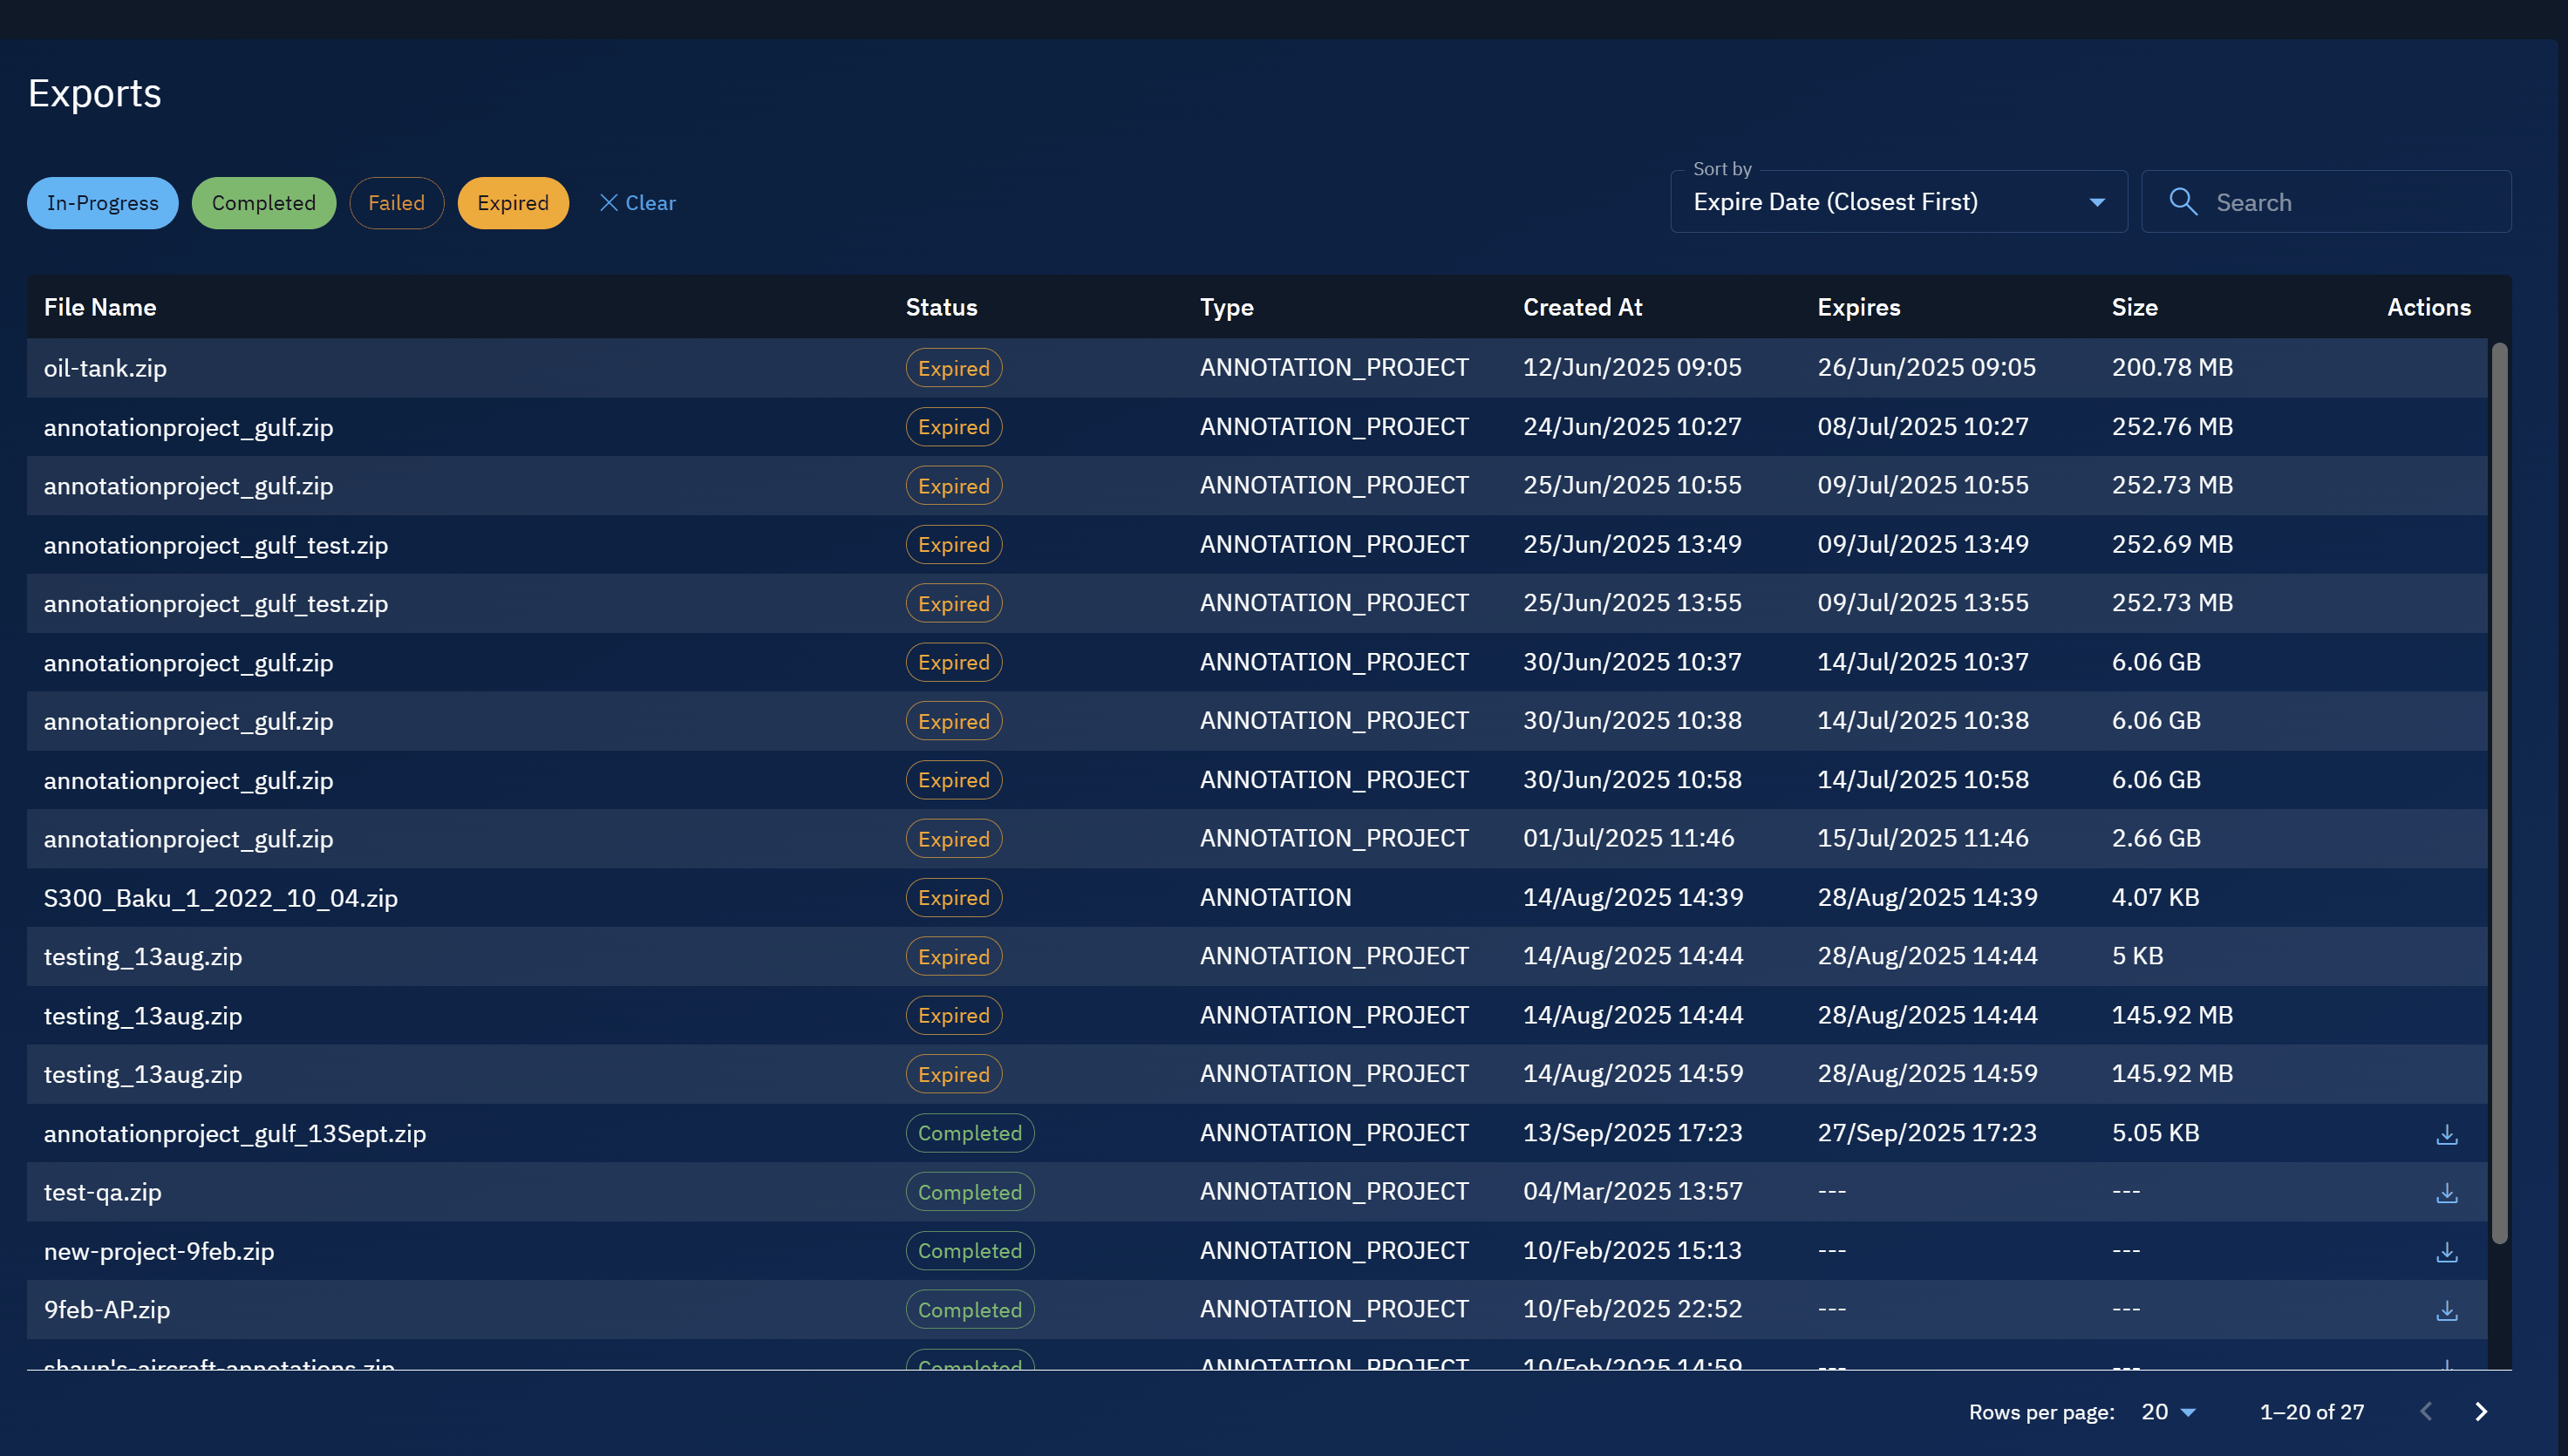
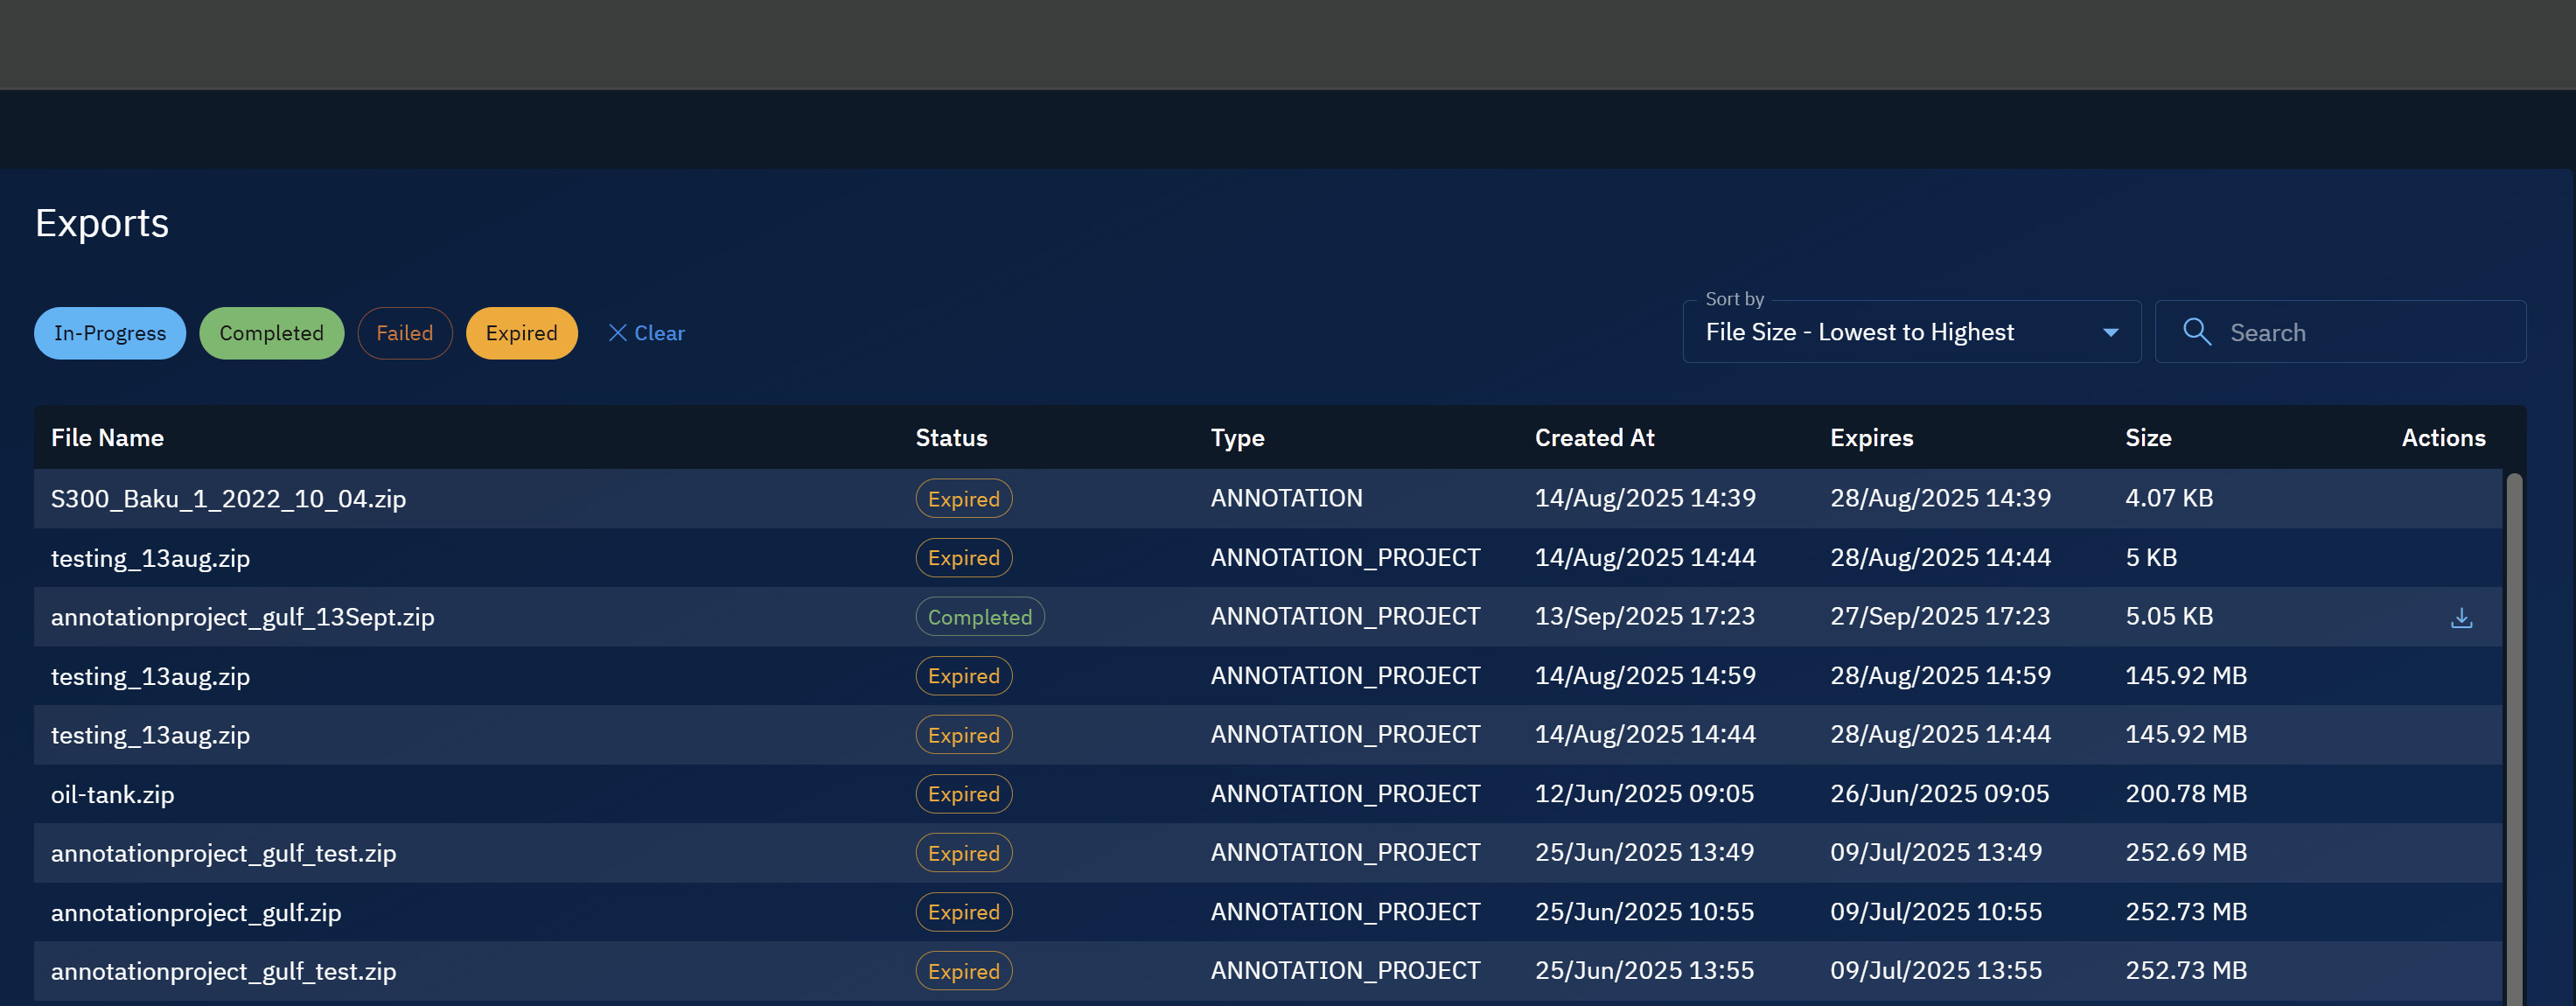
The Exports module not only lists all annotation exports but also provides tools to help you organize and manage them. You can filter exports, sort them by selected headings, and use the Download button to save completed files.
Managing exports ensures you can quickly find what you need and avoid missing expiration deadlines.
Filtering Exports
Use the filter controls to reduce clutter and focus on the exports that matter most.
To filter exports, do the following:
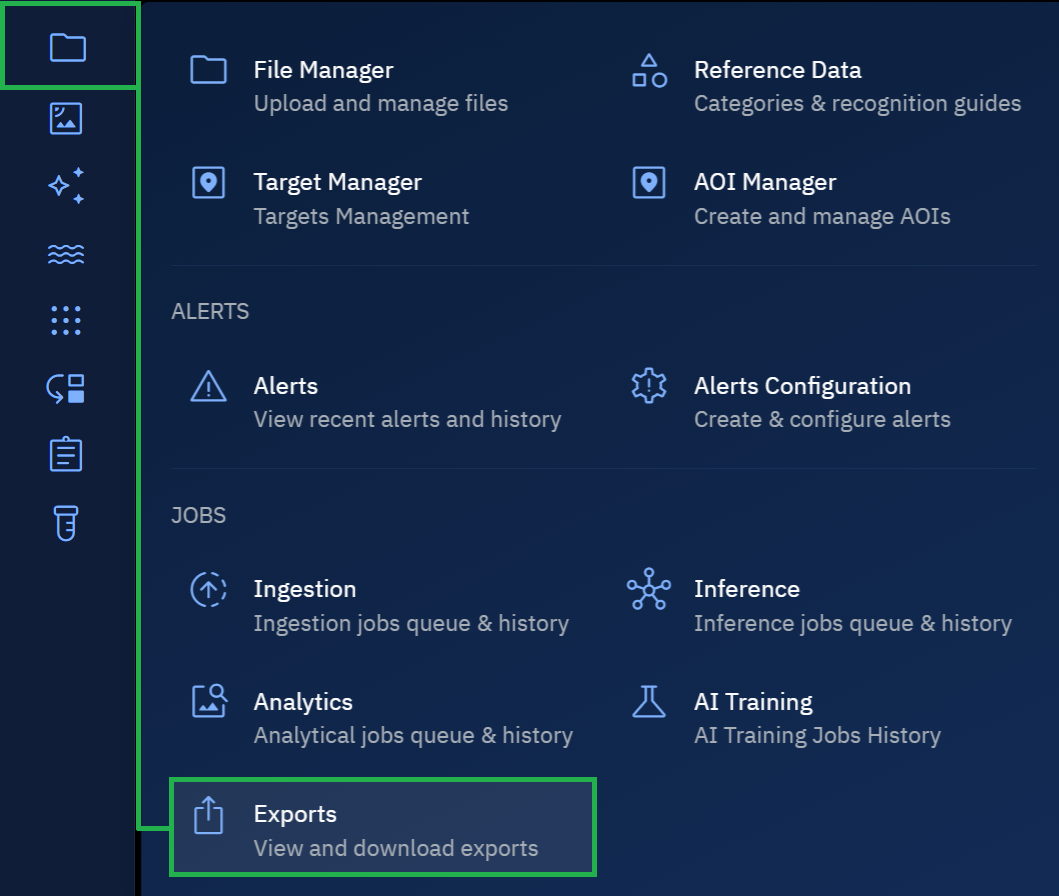
- Log in to the platform.
- Click the Data module, and then click the Exports module.
The Exports Dashboard is displayed.
- On the Exports Dashboard, use the available quick filters to narrow the export list by status or timeframe.
Sorting Exports
You can sort exports to bring the most relevant files to the top of the list. The following options are available:
To sort exports, do the following:
- Log in to the platform.
- Click the Data module, and then click the Exports module.
The Exports Dashboard is displayed.
- On the Exports Dashboard, click the Sort By drop-down list and select any of the following sort options:
- Newest to Oldest – Creation Date
- Oldest to Newest – Creation Date
- Expire Date – Farthest First
- Expire Date – Closest First
- File Size – Highest to Lowest
- File Size – Lowest to Highest
Downloading Exports
Once an export has completed successfully, a Download button appears in the Actions column.
To download an export, do the following:
- Log in to the platform.
- Click the Data module, and then click the Exports module.
The Exports Dashboard is displayed.
- On the Exports Dashboard, locate a completed export and then click the Download button in the Actions column.
The export file is successfully saved to your local computer.
Exports remain available only until their expiration date. Be sure to download them before they expire.