Uploading a Model
This section guides you through each step to ensure your models are prepared for operational deployment.
Preparing to Uploading a Model
Before you get started, prepare the essential files required for model upload:
- YAML file: Contains all configuration settings and parameters for the model
- ONNX file: Contains the actual AI model in Open Neural Network Exchange format
Configuring the YAML file
In this section, you will understand how to prepare the YAML file.
Components of YAML File
A typical YAML file includes the following key sections:
# Basic model identification
model:
  id: 'forest_detection'
  date: '2025-03-20'
  version: 1.0
  description: 'Forest detection model trained on Cloud factory Data'
  labels:
    - 'forests'

  family: multiclass_unet
  type: MULTISPECTRAL
  job_type: segmentation
  tile_size: 1024
  inputs:
    - dtype: float32
      shape: [3, 1024, 1024]

#parameters user can modify:
inference_params:
  confidence_threshold: 0.3
  resolution_default: 0.3
  resolution_minimum: 5
  resolution_maximum: 0.5
# preprocessing:
#     filters:
#         - rescale
#         - improved_lee_sigma
Setting up YAML file
A typical YAML contains the following fields. Depending on the purpose, you can fill in the recommended values.
| Setting | Purpose | Recommended Values |
|---|---|---|
| Version | Defines the model version | 1.0, 1.1, and so on |
| Confidence Threshold | Sets minimum probability for acceptance | 0.5-0.7 for balanced precision/recall |
| NMS Threshold | Controls duplicate detection removal | 0.4-0.5 for most visual models |
| Default Resolution | Standard processing resolution | Model-dependent, typically 640-1280 |
| Min Resolution | Lower boundary for processing | Model-dependent, typically 320-640 |
| Max Resolution | Upper boundary for processing | Model-dependent, typically 1280-2560 |
Uploading Model
This section presents the steps to upload the AI model.
To upload AI model, do the following:
-
Click the AI module and then select the Models sub-module.
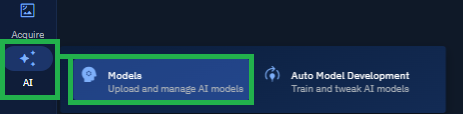
The Models page is displayed.
-
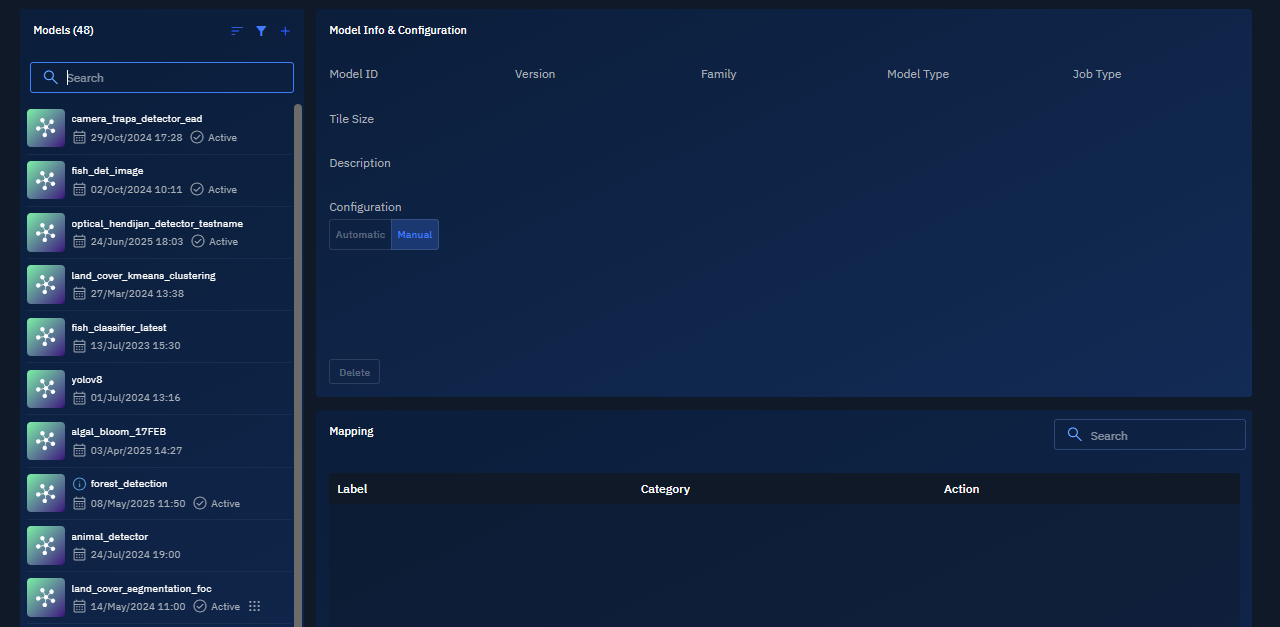
In the Models page, click the + icon.
The Upload Model dialog box is displayed.
-
On the Upload Model dialog box, do one of the following:
- Click the Browse button to locate and select the YAML and ONNX files
- Drag and drop the YAML and ONNX files
-
On the Upload Model dialog box, click the Upload to start the uploading process.
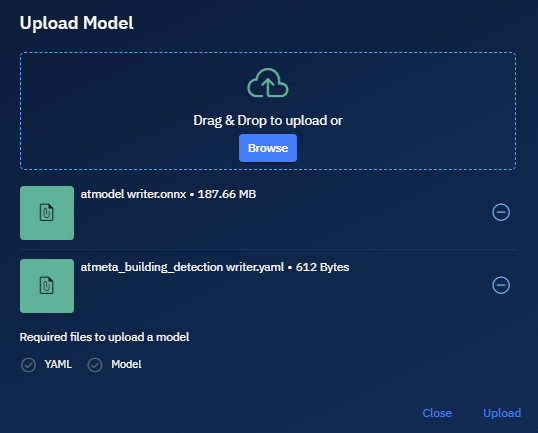
Both the files are uploaded and the model is now successfully uploaded.
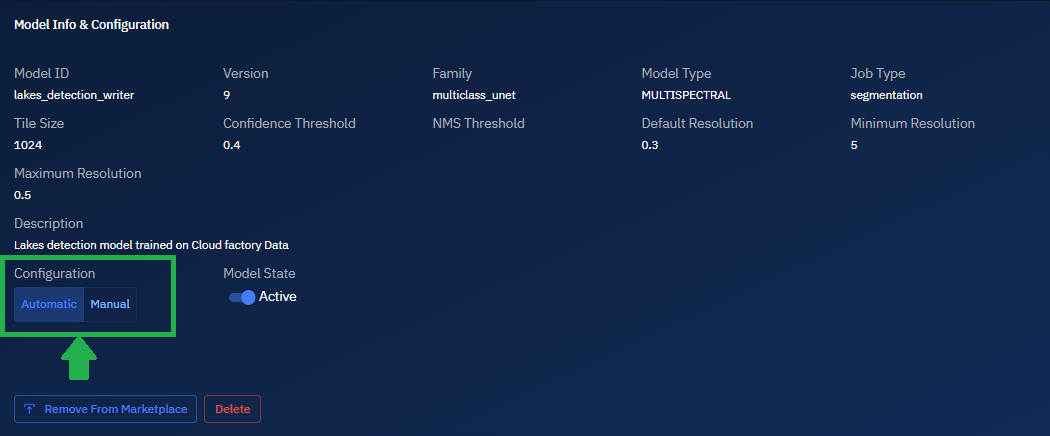
All the model details namely Tile Size, Confidence Threshold, NMS Threshold, Default Resolution, Minimum Resolution are also successfully displayed on the screen.
-
In the Configuration section, select one of the following to determine how models integrate with your platform's workflows. See Workflow Integration & Automation for more information.
- Automatic: Automatically process any incoming data that matches its acceptable parameters
- Manual: Only process data when specifically triggered by an authorized user
-
Toggle Model State button to activate the model.

-
In the Mapping section, click the + to map the model to an appropriate category that accurately reflect the model's capabilities and purpose. See Understanding category mapping

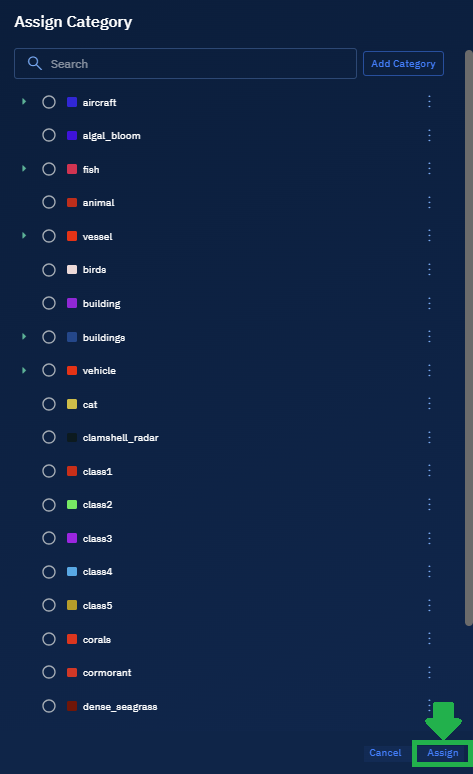
The Assign Category dialog box is displayed.
-
On the Assign Category dialog box, browse and select the appropriate category or categories, and then click the Assign button.
The Assign Category dialog box is displayed.
-
In the Assign Category dialog box, search and select a category and then click the Assign button.
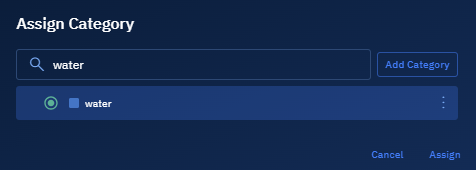
The category name and the category color is successfully assigned to the model.

Workflow Integration & Automation
The Configuration Type (Automatic or Manual) setting determines how your models interact with your platform's data processing pipelines.
Automatic Mode vs. Manual Execution Mode
What happens when you select the Automatic mode vs the Manual mode:
-
When set to Automatic, the model becomes part of automated processing pipelines and will:
-
Automatically process any incoming data that matches its acceptable parameters
-
Execute inference without human intervention immediately after data ingestion
-
Apply pre-configured thresholds and settings to all processed data
-
Generate results that flow directly to downstream systems and dashboards
-
When set to Manual, the model requires explicit human invocation and will:
-
Only process data when specifically triggered by an authorized user
-
Allow case-by-case parameter adjustments before execution
-
Enable more controlled processing for sensitive or variable data
-
Require human verification before results are used in downstream processes
When to select the Automatic mode vs the Manual mode?
This section present the various use cases of automatic and manual mode:
| Use Case | Automatic | Manual |
|---|---|---|
| High-volume, routine processing | ✔ High-volume, routine processing needs | ❌ |
| Well-tested models | ✔ Well-tested models with stable performance | ❌ |
| Time-sensitive applications | ✔ Time-sensitive applications where speed is critical | ❌ |
| Standardized data | ✔ Standardized data with consistent characteristics | ❌ |
| New or experimental models | ❌ | ✔ New or experimental models |
| Critical decision processes | ❌ | ✔ Critical decision processes requiring human oversight |
| Variable data quality | ❌ | ✔ Variable data quality that may need pre-processing |
| Specialized applications | ❌ | ✔ Specialized applications with case-specific parameter needs |
Understanding category mapping
Category assignment directly impacts model discovery and usage. Proper categorization ensures your models are discoverable and usable within the right contexts. This functionality helps you organize models by their capabilities and intended use cases.
- View current label and category mappings
- Use Assign Category to assign or modify existing category assignments
Why Model Categorization Is Critical?
- Discoverability: Proper categorization ensures users can find your model when browsing relevant topics
- Integration: Categories determine which workflows and applications can utilize the model
- Analysis: Categorization enables meaningful performance comparisons between similar models
- Governance: Categories may determine access controls and usage permissions
- Reporting: Analytics and usage statistics are often organized by category