Data Scientist User Documentation
The section enables Data Scientists to manage AI models throughout their lifecycle—ranging from uploading and configuration to publishing, troubleshooting, and performance monitoring.
To perform any operation within this module, you must assign users the appropriate permissions. These permissions determine whether a user can view the module, upload a model, publish it to the marketplace, or manage model versions and configurations.
This section outlines:
- The full lifecycle of managing AI models in the platform
- The required permissions to perform key tasks
- Cross-module permissions that may affect model-related workflows
Use this section as a starting point to understand how to securely and efficiently manage AI model assets in your workspace.
Understanding Permissions for AI Model Management
You must have at least one of the following core permissions: Upload Model or Admin Models` to view and access the Models module.
This section provides a consolidated view of the permissions required to upload, manage, publish, and delete AI models, as well as perform related cross-module tasks.
The Models module does not appear in the navigation panel if AI Model permissions are not assigned. Please contact your Administrator for more information.
Permissions to Manage AI Models
| Permission | What I Enables | Typical Roles |
|---|---|---|
Admin Models | Full control over all model operations including upload, configuration, activation, deletion | System Admin, Model Administrator |
Upload Model | Uploading new models and configuring them, including YAML setup and category mapping | Model Manager, Data Scientist |
Permissions are assigned at the role level by a system administrator.
Module-Level Permissions
Some AI model tasks require permissions in other modules. The table below lists related modules and the permissions needed to complete specific model-related operations.
| Related Module | Permissions | Used For |
|---|---|---|
| Marketplace | Marketplace Creator, Marketplace Admin, Marketplace View | Required to publish, unpublish, or browse models in the marketplace |
| File Manager | Admin Files, Upload Files | Required to upload or manage model file assets |
| Auto Model Development (AMD) | AMD Admin, AMD Creator | Required to train or manage custom AI models |
To publish a model to the marketplace, you must have both Admin Models and Marketplace Creator permissions.
Task-Based Permission Summary
| Task | Required Permissions |
|---|---|
| View Models Module | Upload Model in Models or Admin Models in Models |
| Upload and Configure a Model | Upload Model in Models or Admin Models in Models |
| Delete or Deactivate a Model | Admin Models in Models |
| Publish Model to Marketplace | Admin Models in Models and Marketplace Creator in Marketplace |
| Upload Files for Model Configuration | Upload Files or Admin Files in File Manager |
| Train a Custom Model (AMD) | AMD Creator or AMD Admin in Auto Model Development |
Accessing the Models Sub-Module
In this section, you will get to know how to access the Models sub-module.
-
Login to the platform.
-
Click the AI module and then click the Models sub-module.
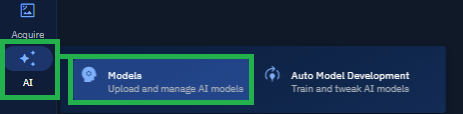
The Models page is displayed.
Uploading a module
Preparing to Uploading a Model
Before you get started, prepare the essential files required for model upload:
- YAML file: Contains all configuration settings and parameters for the model
- ONNX file: Contains the actual AI model in Open Neural Network Exchange format
Configuring the YAML file
In this section, you will understand how to prepare the YAML file.
Components of YAML File
A typical YAML file includes the following key sections:
# Basic model identification
model:
  id: 'forest_detection'
  date: '2025-03-20'
  version: 1.0
  description: 'Forest detection model trained on Cloud factory Data'
  labels:
    - 'forests'

  family: multiclass_unet
  type: MULTISPECTRAL
  job_type: segmentation
  tile_size: 1024
  inputs:
    - dtype: float32
      shape: [3, 1024, 1024]

#parameters user can modify:
inference_params:
  confidence_threshold: 0.3
  resolution_default: 0.3
  resolution_minimum: 5
  resolution_maximum: 0.5
# preprocessing:
#     filters:
#         - rescale
#         - improved_lee_sigma
Setting up YAML file
A typical YAML contains the following fields. Depending on the purpose, you can fill in the recommended values.
| Setting | Purpose | Recommended Values |
|---|---|---|
| Version | Defines the model version | 1.0, 1.1, and so on |
| Confidence Threshold | Sets minimum probability for acceptance | 0.5-0.7 for balanced precision/recall |
| NMS Threshold | Controls duplicate detection removal | 0.4-0.5 for most visual models |
| Default Resolution | Standard processing resolution | Model-dependent, typically 640-1280 |
| Min Resolution | Lower boundary for processing | Model-dependent, typically 320-640 |
| Max Resolution | Upper boundary for processing | Model-dependent, typically 1280-2560 |
Uploading Model
This section presents the steps to upload the AI model.
To upload AI model, do the following:
-
Click the AI module and then select the Models sub-module.
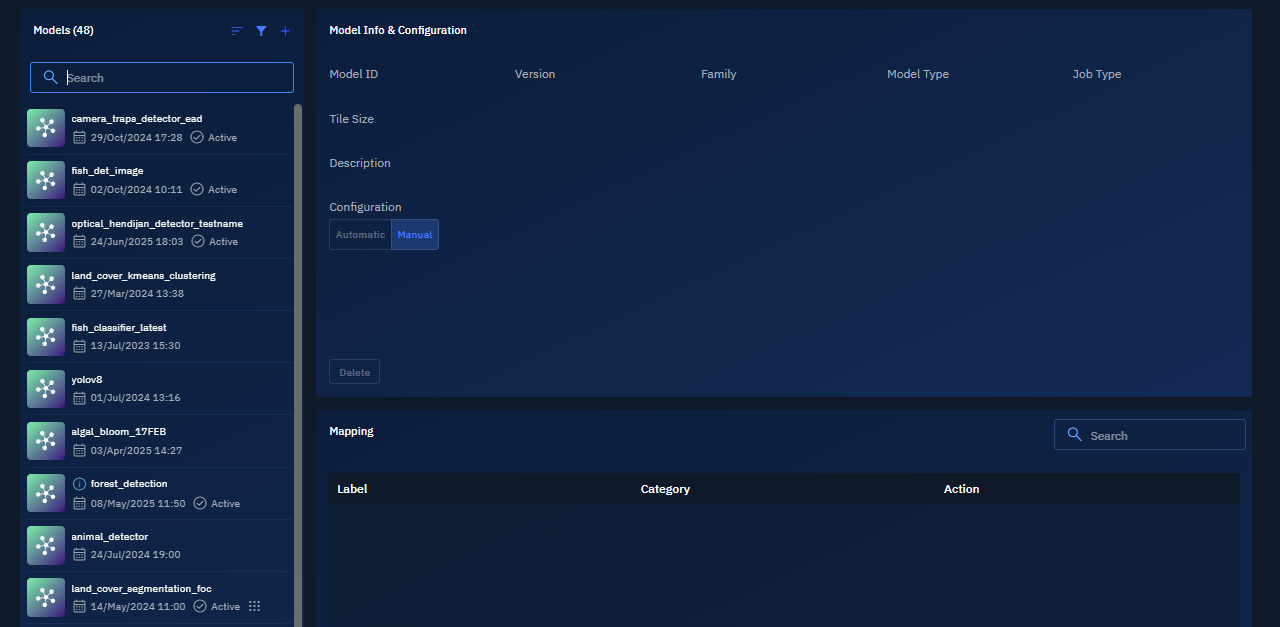
The Models page is displayed.
-
In the Models page, click the + icon.
The Upload Model dialog box is displayed.
-
On the Upload Model dialog box, do one of the following:
- Click the Browse button to locate and select the YAML and ONNX files
- Drag and drop the YAML and ONNX files
-
On the Upload Model dialog box, click the Upload to start the uploading process.

Both the files are uploaded and the model is now successfully uploaded.
All the model details namely Tile Size, Confidence Threshold, NMS Threshold, Default Resolution, Minimum Resolution are also successfully displayed on the screen.
-
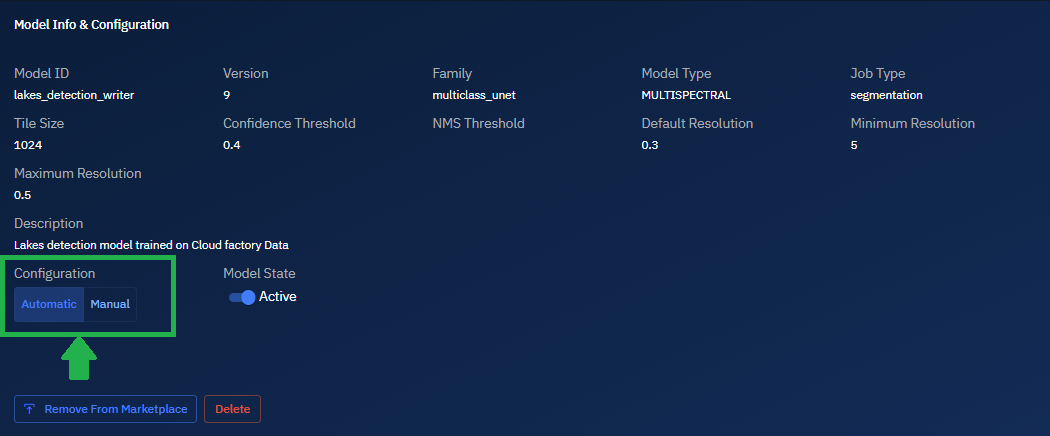
In the Configuration section, select one of the following to determine how models integrate with your platform's workflows. See Workflow Integration & Automation for more information.
- Automatic: Automatically process any incoming data that matches its acceptable parameters
- Manual: Only process data when specifically triggered by an authorized user
-
-
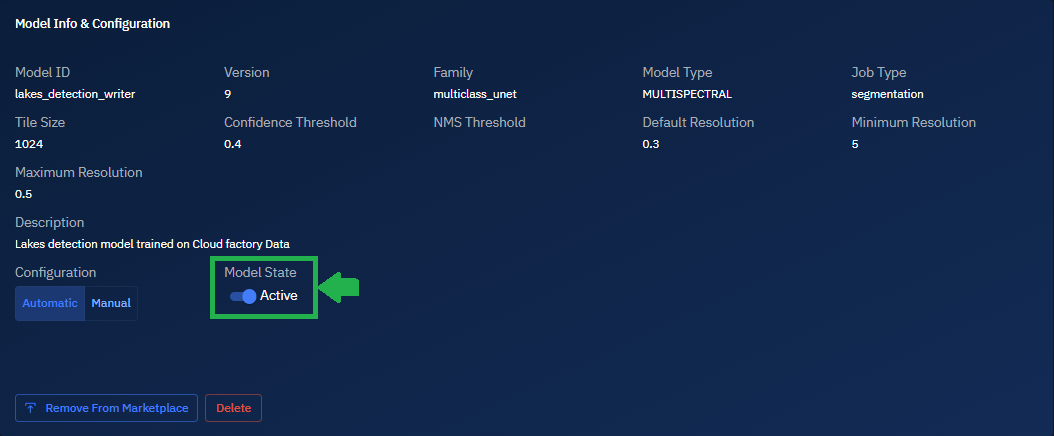
Toggle Model State button to activate the model.
-
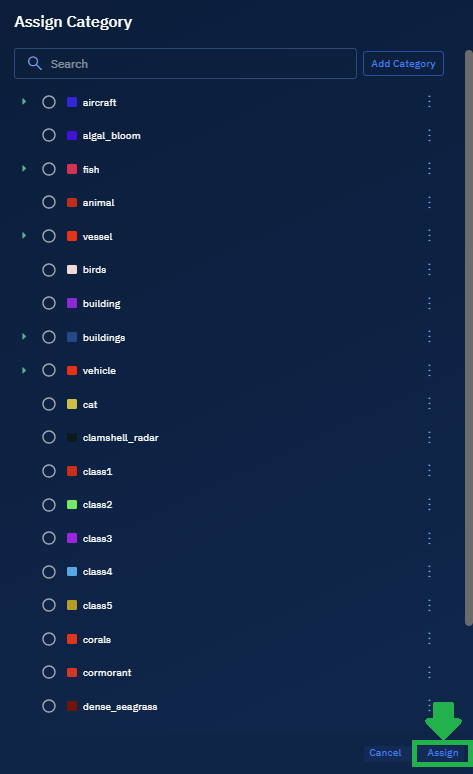
In the Mapping section, click the + to map the model to an appropriate category that accurately reflect the model's capabilities and purpose. See Understanding category mapping

The Assign Category dialog box is displayed.
-
On the Assign Category dialog box, browse and select the appropriate category or categories, and then click the Assign button.
The Assign Category dialog box is displayed.
-
In the Assign Category dialog box, search and select a category and then click the Assign button.
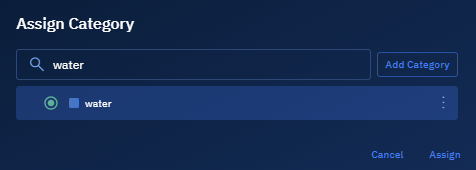
The category name and the category color is successfully assigned to the model.

Workflow Integration & Automation
The Configuration Type (Automatic or Manual) setting determines how your models interact with your platform's data processing pipelines.
Automatic Mode vs. Manual Execution Mode
What happens when you select the Automatic mode vs the Manual mode:
-
When set to Automatic, the model becomes part of automated processing pipelines and will:
-
Automatically process any incoming data that matches its acceptable parameters
-
Execute inference without human intervention immediately after data ingestion
-
Apply pre-configured thresholds and settings to all processed data
-
Generate results that flow directly to downstream systems and dashboards
-
When set to Manual, the model requires explicit human invocation and will:
-
Only process data when specifically triggered by an authorized user
-
Allow case-by-case parameter adjustments before execution
-
Enable more controlled processing for sensitive or variable data
-
Require human verification before results are used in downstream processes
When to select the Automatic mode vs the Manual mode?
This section present the various use cases of automatic and manual mode:
| Use Case | Automatic | Manual |
|---|---|---|
| High-volume, routine processing | ✔ High-volume, routine processing needs | ❌ |
| Well-tested models | ✔ Well-tested models with stable performance | ❌ |
| Time-sensitive applications | ✔ Time-sensitive applications where speed is critical | ❌ |
| Standardized data | ✔ Standardized data with consistent characteristics | ❌ |
| New or experimental models | ❌ | ✔ New or experimental models |
| Critical decision processes | ❌ | ✔ Critical decision processes requiring human oversight |
| Variable data quality | ❌ | ✔ Variable data quality that may need pre-processing |
| Specialized applications | ❌ | ✔ Specialized applications with case-specific parameter needs |
Understanding category mapping
Category assignment directly impacts model discovery and usage. Proper categorization ensures your models are discoverable and usable within the right contexts. This functionality helps you organize models by their capabilities and intended use cases.
- View current label and category mappings
- Use Assign Category to assign or modify existing category assignments
Why Model Categorization Is Critical?
- Discoverability: Proper categorization ensures users can find your model when browsing relevant topics
- Integration: Categories determine which workflows and applications can utilize the model
- Analysis: Categorization enables meaningful performance comparisons between similar models
- Governance: Categories may determine access controls and usage permissions
- Reporting: Analytics and usage statistics are often organized by category
Managing Models
As your AI model collection grows, effective library management becomes essential for maintaining system performance and user satisfaction. This section presents how to view, search, filter, and sort your models.
Reuploading Model
As an admin, you may need to upload an AI model in the following situations:
-
To upload a new version of a model: When you're updating an existing model with improved performance or updated parameters.
-
To retry a failed upload: If the initial upload did not complete successfully, and the model is not registered in the system.
Uploading a new version of a model
AI models undergo continuous development and refinement across multiple iterations. If you’ve updated your model architecture, parameters, or training data, follow the steps below to upload the latest version to the platform.
Pre-requisites: Before you upload a new version of a previously uploaded AI model, ensure you have done the following:
- Configured the YAML file
- Updated version number in the YAML file
To upload a new version of a model, do the following:
-
Follow the steps mentioned in the section Uploading a Model.
-
Confirm the new version is uploaded and then verify if the system displays the new version:
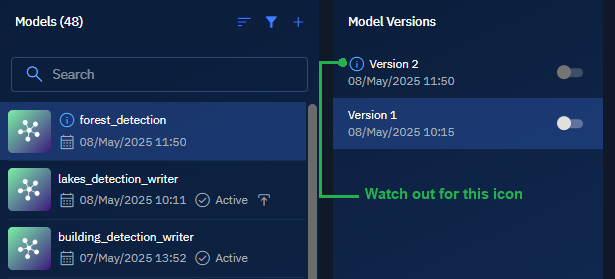
Uploading a model that failed upload
In rare cases if the upload fails, then you can try to reupload the model again.
Pre-requisites:
-
Confirm if the platform displays the following icon for failed uploads:
To upload a model, do the following:
- Follow the steps mentioned in Uploading Model section.
- Confirm the upload is successful.
Managing Model Versions
In this section, you will get to know how to manage various versions of an AI model and deleting obsolete versions.
Version Control of Models
When you upload a new version of an existing AI model, the platform automatically extracts the version number from the model’s YAML file. This version number is displayed in the Models Versions section.
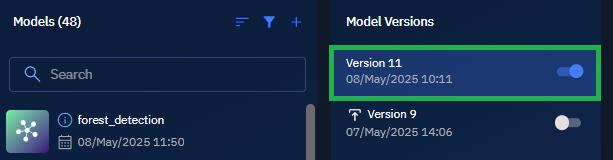
To enable a specific version of an AI model, do the following:
-
Upload a new version of the model. Ensure that you have updated the version number in the model's YAML file.
The new version of the model is displayed and enabled on the platform.
-
If there are multiple versions of the model, locate the version number that you want to enable for inference, and click the toggle button to activate the model.
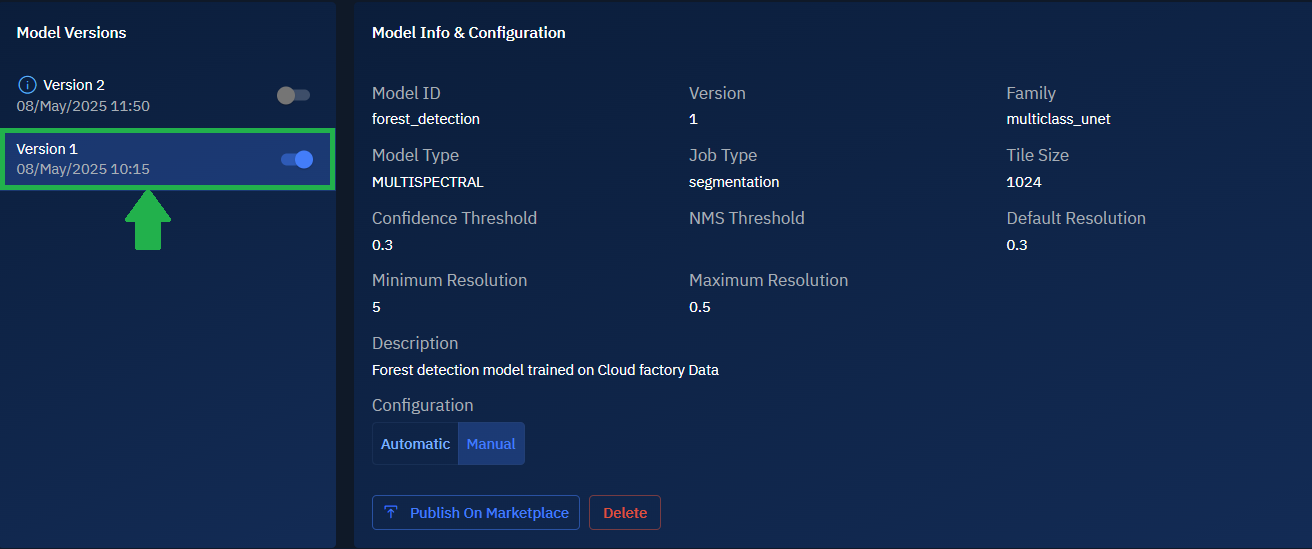
At any time, only one AI model version can be enabled for automatic or manual inference in the system.
Deleting Versions of a Model
You can delete a specific version of an AI model if it is deprecated, obsolete, or no longer in use.
To delete a version of a model, do the following:
-
In the Model Versions section, locate the version number that you want to delete.
-
Click the Delete icon for the specific model.
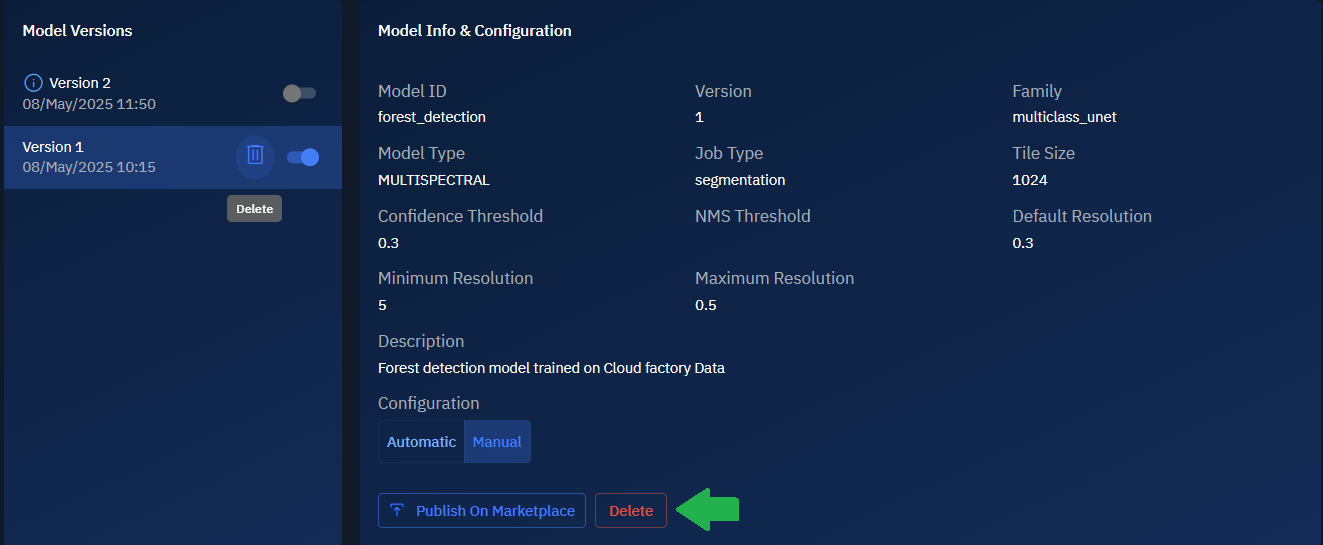
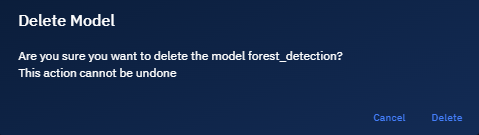
The Delete Model dialog box is displayed.
-
In the Delete Model dialog box, click the Delete button.
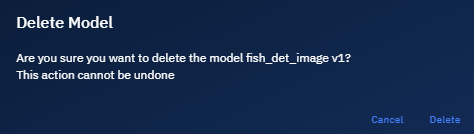
The version is successfully delete from the platform.
Managing Models on Marketplace
The platform enables you to publish your own models on the marketplace. You can also subscribe to models published by other other organizations on the platform.
Publishing a Model on Marketplace
Models can be published on the marketplace. This enables other organizations to subscribe to your models and use them for their benefits.
To publish models on marketplace, do the following:
-
Locate the model that you want to publish. Ensure that you own the model.
-
In the Model Info & Configuration section, click the Publish on Marketplace button to start the process of publishing the model.
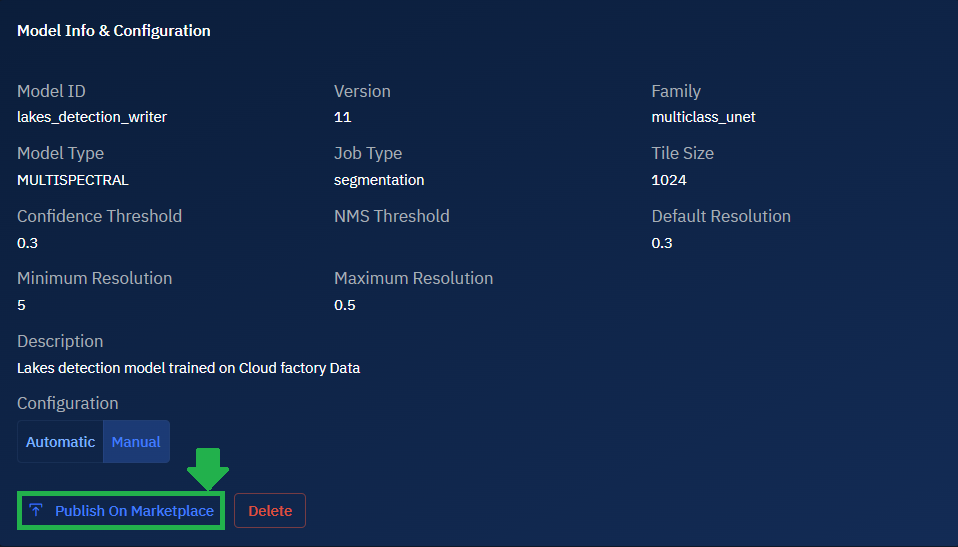
-
Type or select the appropriate information about the model, and then click the Publish on Marketplace button.
The Add Marketplace Item page is displayed.
-
In the Add Marketplace Item page, add information about the model and click the Publish button.
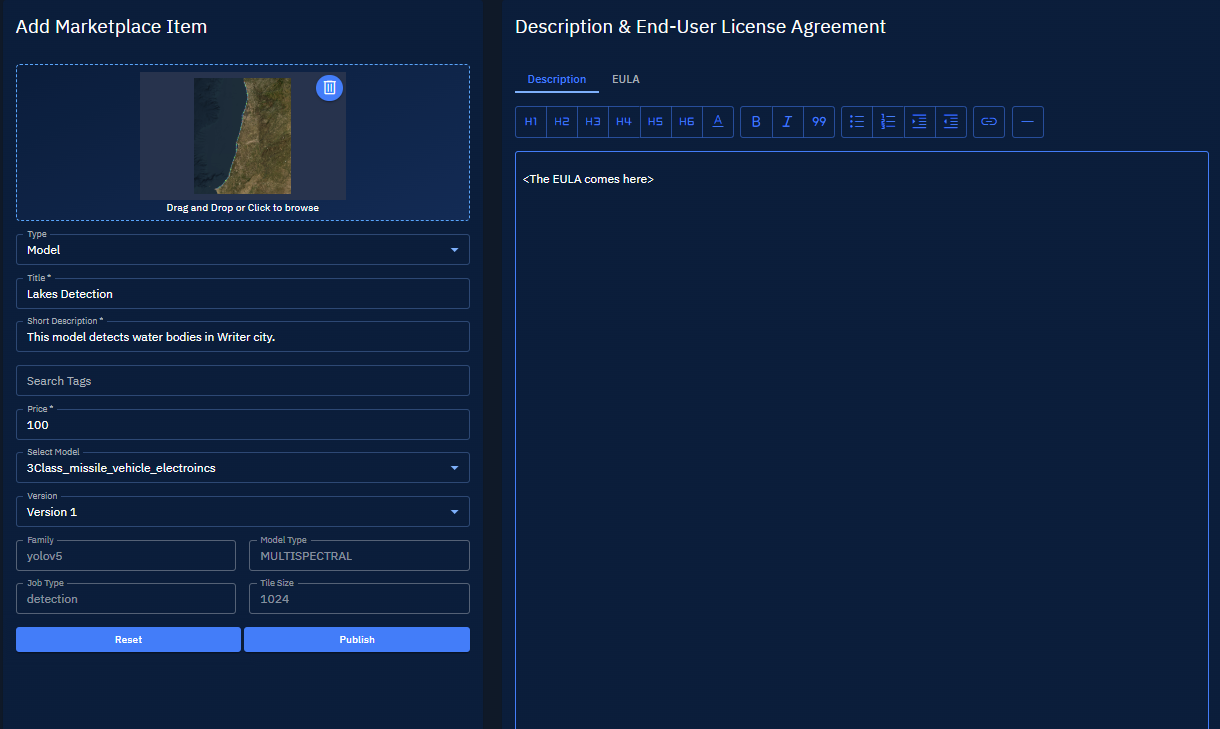
The model is successfully published on the marketplace.
Removing a Model from Marketplace
When you remove an model from the marketplace, the organizations or individuals who have subscribed to your model will automatically unsubscribed from the model.
To remove models on marketplace, do the following:
-
Locate the model that you want to remove.
-
In the Model Info & Configuration section, click the Remove from Marketplace button to start the process of removing the model.
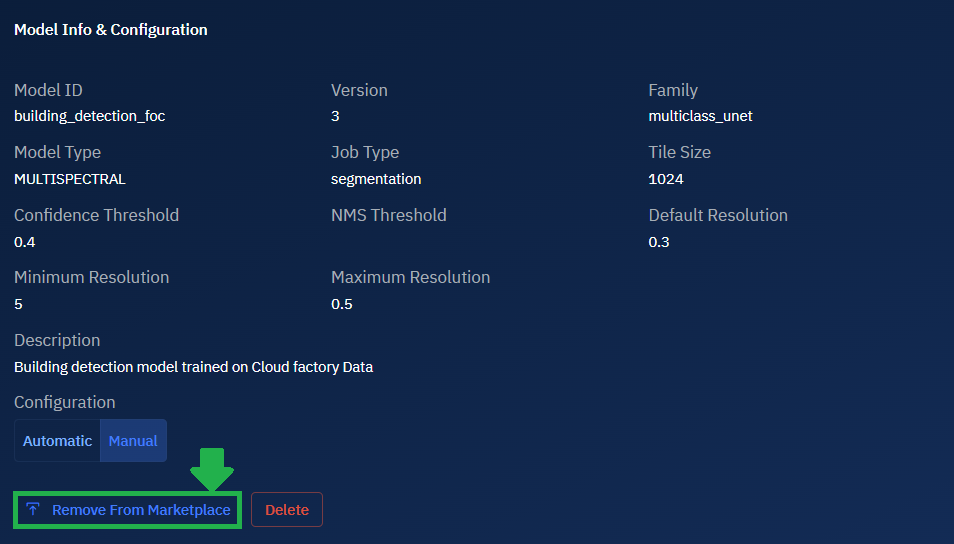
The Delete Marketplace Item dialog box is displayed.
-
In the Delete Marketplace Item, click the OK button to permanently remove the item from the marketplace.
The model is successfully removed from the marketplace.
Unsubscribing a Model from Marketplace
As an organization or individual, you can unsubscribe from a model published by another organization.
To unsubscribe from marketplace, do the following:
-
Locate the model that you want to remove.
-
In the Model Info & Configuration section, click the Unsubscribe button to start the process of removing the model.
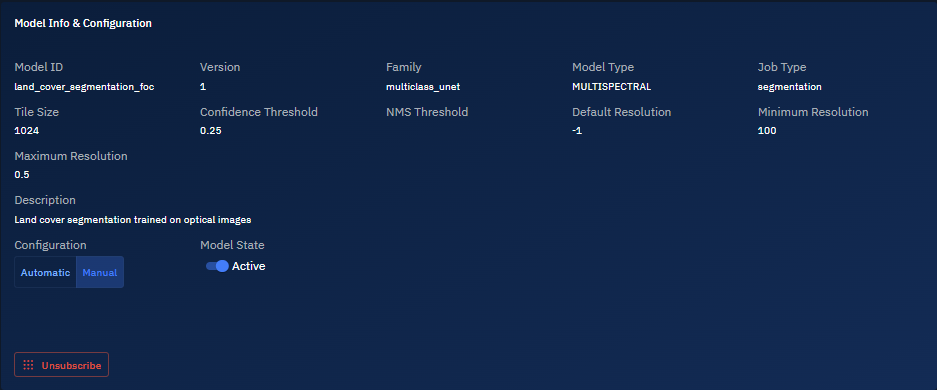
The Unsubscribe from model dialog box is displayed.
-
In the Unsubscribe from model, click the Unsubscribe button to unsubscribe from the item.

Deleting a Model from Marketplace
When you delete a model, all the versions of the model are also removed from the platform.
To delete a model, do the following:
-
Locate the model that you want to remove.
-
In the Model Info & Configuration section, click the Unsubscribe button to start the process of removing the model.
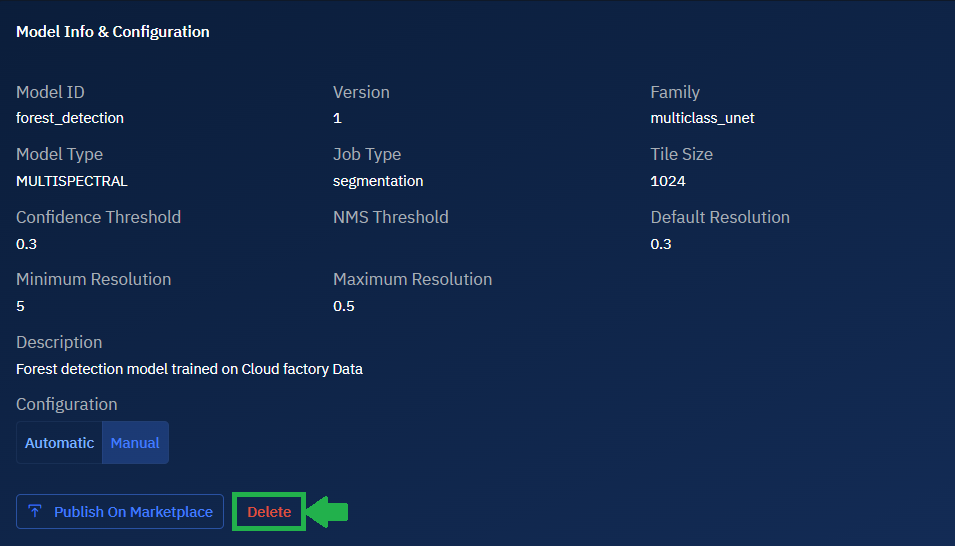
The Delete Model dialog box is displayed.
-
In the Delete Model dialog box, click the Delete button to permanently delete the model from the platform.
Managing Your Model Library
As your AI model collection grows, effective library management becomes essential for maintaining system performance and user satisfaction.
This section presents how to view, search, filter, and sort your models.
Viewing Models
You can view all AI models available to you in the Models module. The list may include models you have uploaded, models you have subscribed, models available across your organization or workspace, or models published on marketplace.
To view models, do the following:
-
Click the AI module and then select the Models sub-module.
The Models page is displayed.
-
In the Models page, view the complete list of AI models available in the platform.
-
Select any model and view the following details of the model.
| Parameter | Description | Significance |
|---|---|---|
| Model ID | Unique identifier for the model | Used for API calls and system references |
| Version | Current iteration of the model | Tracks development progression and compatibility |
| Family Model Type | Classification of AI model architecture | Determines capabilities and computational requirements |
| Job Type | Processing task the model performs | Defines the model's functional purpose |
| Tile Size | Image processing segment dimensions | Affects processing speed and memory requirements |
| Confidence Threshold | Minimum probability score for acceptance | Controls precision vs. recall balance |
| NMS Threshold | Non-Maximum Suppression overlap tolerance | Prevents duplicate detections in visual models |
| Resolution Parameters | Default, minimum, and maximum processing dimensions | Ensures optimal performance across different inputs |
| Configuration Type | Whether settings are Automatic or Manual | Determines workflow automation and execution mode |
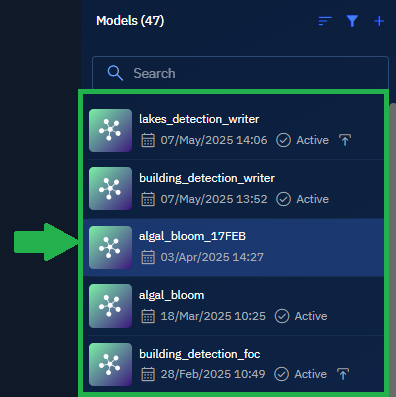
Searching Models
You can use the search bar at the top of the Models module to quickly find a model by name. You can search using full or partial keywords.
To find a model, do the following:
-
Click the AI module and then select the Models sub-module.

The Models page is displayed.
-
In the Models page, type the name of the model in the search box.
The platform will automatically display matching models as you type in the search bar.
-
Select any model and view the following details of the model:
Parameter Description Significance Model ID Unique identifier for the model Used for API calls and system references Version Current iteration of the model Tracks development progression and compatibility Family Model Type Classification of AI model architecture Determines capabilities and computational requirements Job Type Processing task the model performs Defines the model's functional purpose Tile Size Image processing segment dimensions Affects processing speed and memory requirements Confidence Threshold Minimum probability score for acceptance Controls precision vs. recall balance NMS Threshold Non-Maximum Suppression overlap tolerance Prevents duplicate detections in visual models Resolution Parameters Default, minimum, and maximum processing dimensions Ensures optimal performance across different inputs Configuration Type Whether settings are Automatic or Manual Determines workflow automation and execution mode
Sorting Models
You can view the list of models by the most recently uploaded, edit date, or model name. You can also sort the list in ascending or descending order.
Both the sorting options can be applied individually or combined. For example, you can sort by model name in ascending order, or by most recently uploaded in descending order.
To sort models list, do the following:
-
Click the AI module and then select the Models sub-module.
The Models page is displayed.
-
In the Models page, click the Sort icon, and then one or both of the following:
-
Select the Most Recent or Name option in the Sort By drop-down list.
-
Select the Ascending or Descending option in the Sort Direction drop-down list.
The platform will instantly sort the models list in the following way:
-
Most Recent: Displays the most recently uploaded or edited models at the top.
-
Name: Sorts models in alphanumeric order, meaning names starting with numbers (e.g., 70cm_aircraft_data) appear before those starting with letters (e.g., Alphamap). You can toggle between A–Z and Z–A order.
-
Ascending / Descending: Reverses the selected sort order for any of the above criteria.
Filtering Models
-
You can use filters to narrow down the list of models based on criteria such as model state and model availability. Filters help you quickly locate specific models from a large dataset.
To sort models list, do the following:
-
Click the AI module and then select the Models sub-module.
The Models page is displayed.
-
In the Models page, click the Filter icon, and then one or both of the following:
- Select the Active or Inactive option in the Model State drop-down list.
- Select the Available or Not Available option in the Model Availability drop-down list.

The platform will instantly filter the models list in the following way:
- Model State: Active or Inactive
- Model Availability: Available or Not Available